Last updated on May 5th, 2026 at 07:27 am
Everyone had issues with their kamado’s fit and finish after future high temperatures caused grease to ignite. The question comes here about how grease is collected in the kamado joe grill. I had the feeling that we needed to discuss this matter.
Kamados have an inner firebox, as you may have noticed. Fireboxes and outer shells almost always have an air gap between them. A fire down in the coals reaches much higher temperatures than the actual cooking surface.
- What is a Kamado Grill?
- How Do Kamado Grills Work?
- How Much Charcoal Should You Use?
- Kamado Joe Kitchen Safety Tips
The issue of overheating the outer shell (Akorn) or cracked outer shells (ceramic Kamados) would arise if the firebox and air gap were missing. A firebox must always be kept closed to contain the fire.
Direct cooking (without a diffuser/drip pan) is usually desired in this application since high heat grilling requires a large area of burning coal. The fat dripping into the lump still needs to be considered. A great deal of grease drips onto burning coals, where it burns up before going into an ash collection plate.
The area that does not have burning coals will have some of the protein sitting above and dripping fat if your cooking grate is completely loaded (from top to bottom) with protein (burgers, steaks, wings, leg quarters, etc…).
This is especially pertinent when your cooking grate is situated above the air gap between the firebox and the outer shell. There will be a drain for any fat drippings to run into.
What is a Kamado Grill?
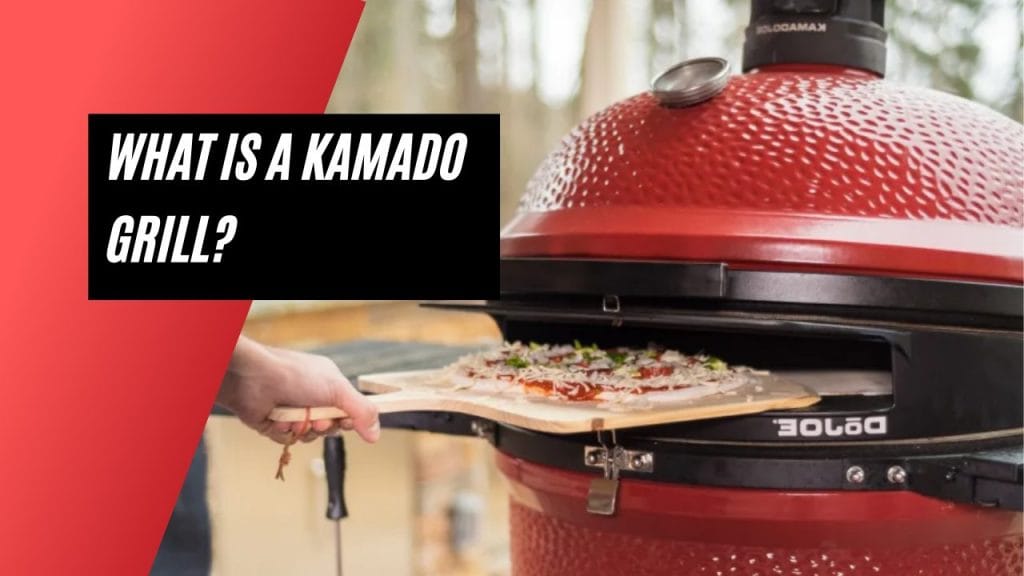
Before going for a collection of grease in the kamado joe grill, read here what is kamado joe grill actually. Kamado grills have their origins in Japan, which is why ‘kamado’ sounds like a type of martial art.
It refers to the place where cauldrons are kept. The Japanese word ‘kamado’ means ‘stove’. In the aftermath of the Second World War, a portable version attracted the attention of hungry American soldiers stationed in Japan, and soon after made its way back to the States.
The kamado became the egg-shaped grills that we know today without going into great detail about its past.
How Do Kamado Grills Work?
Stainless steel and cast aluminum are some of the materials used in Kamados. Kamados made of ceramic is, however, the best. In addition to being heavy and vulnerable, this material can also retain and transmit heat very efficiently – and that’s why kamados are so great.
Important: In the Kamado, charcoal fires in the firebox draw oxygen from a vent at the bottom, which provides controlled amounts of oxygen to the fire.
After the food on the cooking grates is placed on the cooking grates, the heat and smoke are drawn into the cooking chamber and drawn towards the vent at the top.
All-over cooking is possible with ceramic surfaces because of their ability to absorb and radiate heat. According to the cooking style chosen, food on the grates is cooked either slowly or quickly.
In What Ways Can You Cook on a Kamado?
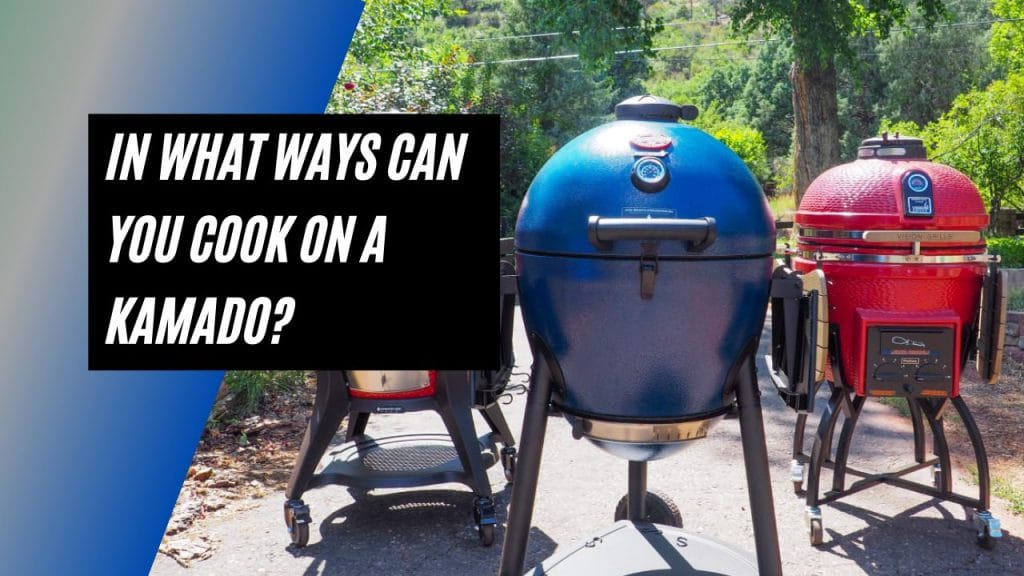
There are many ways to cook food with a kamado. These appliances can generate and apply high direct heat effectively, allowing them to sear and grill at the same time, producing amazing flavor and browning as well as cooking food quickly. In addition to using it as a smoker, it can also be used for cooking low and slow brisket, ribs, and more.
With a good quality kamado, baking and roasting can also be achieved. When you are roasting or baking, it helps to have a heat deflector as it mimics your kitchen oven. So, you have to keep a clean kamado joe heat deflector.
Also, you can cook authentic pizzas on a kamado and a pizza stone at approximately 700 degrees Fahrenheit. The Outback stove is one of the most versatile outdoor cooking stations there is a true all-in-one solution.
Always Start With a Clean Kamado Joe:
First things first: let’s get started with how to clean kamado joe. It would be better to start at the very beginning – after you finished your last cooking session.
The majority of the food debris should have been scraped off on the grates while they were still warm. Give them another look after pulling them out. Last time you couldn’t seem to remove something stubborn. Now you may be able to.
If you’re emptying the ash left by the last load of charcoal, do so while you’re at it. By clogging and blocking vents and interfering with airflow, ash significantly impairs Kamado performance and temperature stability.
Stir up the coals so that all the trapped ash falls into the bottom of the Kamado where it can be collected. Make sure to deposit the ash in a steel garbage can or another suitable container.
You should not have to do any additional cleaning if you cover your Kamado between uses. Mold in kamado joe or mildew can form on the inside of your house due to trapped moisture, but do not panic or attempt to clean it with chemical cleaners. Self-cleaning kamado Joe is available.
So instead, let the internal temperature slowly rise up to 600F (316C) by building up a nice hot fire. Keep that in the refrigerator for 15 minutes before removing it. Simply brush off any residue when the mixture has sufficiently cooled.
How Much Charcoal Should You Use?
Most of the time, we find it’s better to approach life with caution in most situations. When you light your Kamado, you should always use a full load of coals. Charcoal should never run out during a smoke session because, quite frankly, re-filling your container is a real pain.
Though, don’t worry about wasting your good wood. Simply close the vents and you can snuff them out when you’re done, then you can store anything you haven’t used. However, picking your spots is still important.
Imagine you’re preparing for some low and slow smoking. Wouldn’t it be nice if you had a nice pork butt? That means your target temperature is probably going to be 225F to 250F. Fuel should only be used at low temperatures if the temperature is below freezing.
Likewise, searing at high temperatures is not advisable. The only way to get great results from your Kamado is by using lump wood charcoal. You should crank it up to 500F (260C) or higher.
What are the Reasons?

Fuel that has been partially used doesn’t burn as well or as consistently as fuel that is brand new. As a result, if you’re trying to keep the temperature down, you’re at risk of it going out completely. Similarly, if you use a motor, you won’t be able to reach the rocket-launch temperatures required for an optimal sear.
It’s fine to reuse leftover charcoal for all oven-to-grill points between 250°F and 500°F. When you add more charcoal to the load, the unpredictability of the old charcoal will be eased, and you will have no problem heating at medium temperatures.
How to Configure Your Coals?
Cooking, grilling, or smoking is impossible without consistent heat. To make sure a good steady fire burns down at the bottom of the kamado, it’s essential to get a good steady fire going. To do this, you must properly configure your coals.
Making a pile of charcoal may not sound like ancient wisdom handed down through the centuries, but it is the best method to use to prepare charcoal. Put your fuel in a mound in the beginning and move it up until you reach a peak.
Pro Tip: You should make the base wide and the peak deep enough to reach below the holes in the fire ring on the Kamado. In addition, the peak should rest at the same height as the firebox.
In the pile, place the biggest lumps of lump wood at the bottom. What are the reasons? By doing this, gaps will be created between the pieces, and the fire grate will not become blocked with pieces stuck together.

The oxygen provided by airflow is absolutely necessary for the burning of charcoal. Having established the foundation, you don’t have to worry about the size of the pieces as much when finishing the pile. Your mix should be varied in size.
It’s normal to think you’ll get a better burn if you use all large pieces, but using smaller pieces will give you a more even burn with a more stable burn.
Additionally, the bag won’t be filled with only large pieces, so the smaller pieces will need to be stored somewhere. You can now make fire with the charcoal you’ve just prepared!
Protective Types of Equipment:
Heatproof gloves are highly recommended (and we mean HIGHLY recommended). Getting all macho and ignoring common sense isn’t a good idea here. Getting severely burned while kamados can ruin your day before you can ask, “Let me just check on those coals.”.
If you want to keep your clothes clean, putting on an apron is a good idea too. If there’s hot charcoal, hot food, or hot grease in the air, it’s always best to wear closed-toed shoes. When you’re done cooking, make a fashion statement. You are almost ready to start cooking once all your gear has been cleaned and inspected.
Removing Ashes:

A simple ash removal system is included on the Classic and Big Joe grills from Kamado Joe. The included ash tool should be used each time you use your Kamado Joe to remove loose ash from the firebox before cooking.
Shut down kamado joe before removing the Ash. The loose ash will fall onto the ash collection pan through the fire grate. Ashes should be disposed of in the loose form. Remove the ash collection pan. You should now have a grill that is ready for cooking.
Place the ash collection pan back in the grill base.
- After cleaning the inside surface with a plastic bristle brush, you can scoop or vacuum the debris off the bottom of the grill before replacing the ceramic components. The inside grill should be cleaned once or twice a year.
- If the fire ring and firebox have been removed, you should use a brush and a vacuum to clean the inside surface before reinstalling the ceramic parts. Afterward, you should clean the surrounding area of residual ash and debris.
Maintaining The Grill Bands:
Every year, look at the bands and make sure that they are positioned and tight. Make sure the nut is tight by using an Allen wrench and a 10mm wrench. While holding the 10mm wrench in place with the Allen wrench, you shouldn’t be able to turn it easily.
A loose nut should be tightened firmly. Loosen the band enough to push it back into place if it is not centered on the gasket material. The band can also be placed on top of a block of wood and lightly tapped with a hammer until it sits in place.
Use a 10mm Allen wrench and 10mm wrench to tighten the band connector.
Mould/Mildew:
You may see areas of mold or mildew on the cooking grill or indoor ceramic when your Kamado Joe grill is not used for a long period of time. Fortunately, Kamado Joe Grills is self-cleaning, so this problem can be avoided easily. DO NOT use bleach or other cleaning products. It adds an unpleasant taste to food.

Add Charcoal and Turn it On:
Install the main Divide & Conquer rack with the X-rack in the highest position with both heat deflector panels on the X-rack. Make sure your kamado joe deflector plates should be clean.
Fully open the top and bottom vents and allow the temperature inside the grill to rise to 600 ° F (315 ° C) with the dome lid closed.
Maintain the temperature at around 315 ° C (600 ° F) for 15-20 minutes. Close the bottom vent completely and wait another 15-20 minutes to close the top vent.
This process will burn off any unwanted residue from inside the grill. Before cooking again, brush the cooking grate with a regular grill brush. Use a soft bristle brush on the ceramic to remove any residue.
The heat deflector plates should also be free of any burnt residue after this process. Brush them with a soft-bristled brush after cleaning.
When your heat deflectors get dirty during normal use, flip them dirty side down for the next cooking and the heat from the fire will automatically clean that side of the deflector plate.
Adjust The Tension Of Your Big Joe Hinge
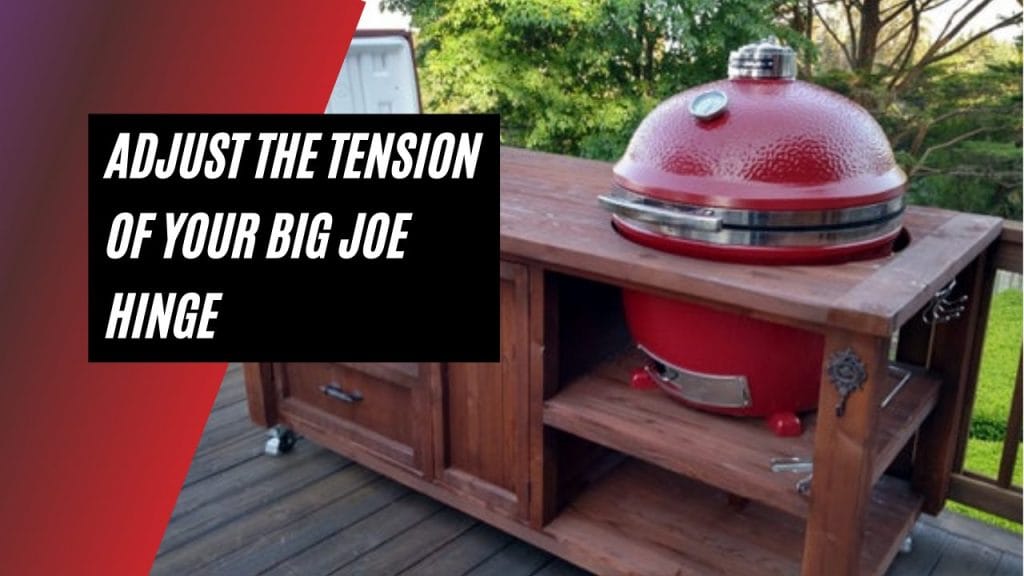
Over time, your BigJoe’s zipper tension may need to be adjusted. This will ensure that minimal effort is required to fully raise the dome and that it remains stationary when fully open.
Place the Dome Element in the “Closed” Position
Facing the back of the grill, use a 10mm Allen wrench to tighten the two larger bolts located at the bottom of the rear of the hinge box. Verify that the dome remains stationary in the “fully open” position. If not, close the dome, tighten the two bolts and check again.
If fully tightening the two bolts still does not allow the dome to remain stationary in the “fully open” position, contact Kamado Joe for spring replacement and installation instructions.
Kamado Joe Kitchen Safety Tips
We’ve mentioned some important safety guidelines for using your Kamado, but we’ll list them here and more, in case you missed them. The safe operation of your Kamado is good for both you and your grill.
Avoid dangerous “flashbacks” (also called “backdraft”) or accumulated heat; before opening the lid fully, open 2-3 inches for 5 seconds to allow the heat to escape before opening the rest of the path:
- Never use your Kamado indoors or in the garage
- Do not attempt to remove or discard hot ashes
- Never use on a surface that is not heat resistant
- Keep children and pets away during use
- Never move a kamado while it is in use
- Use on a flat surface
- Don’t look into the best guy while it’s in use
At this point, either you are ready to go out and start creating masterpieces on your Kamado, or you want to buy your own. Owning and using a kamado can be an incredibly rewarding experience for those who truly enjoy grilling and grilled food.
So good luck with your grilling and if you need any further advice or help, please contact me in the comments below, I’m always happy to help.
Bottom line
Once you are done cooking and the food is resting, it is time to turn off your Kamado. First, close the bottom vent to shut off the oxygen supply and turn off the coals. Leave the top vent open just a little, maybe 1/8 of the way, to allow smoke and heat to escape. Then go for cleaning kamado joe top vent.
On average, it will take 30 to 45 minutes for the fire to go out completely, depending on how intense it was at first. Go enjoy your meal and company, and then go back to cleaning the grates while they are still warm.
Trust us when we tell you that it is MUCH easier to get food and grease from a hot grill than from a cold one. Just remember to wear gloves to avoid burns. Once done, close both the top and bottom vents, leaving only a small slit open at each point. This allows air to continue flowing and inhibits the growth of mold and mildew.
When you’re sure it’s completely, completely, 100%, completely cooled, go ahead and put the cover on and/or move it to a warehouse. Placing a cover on a still-hot grill could damage the cover, then make sure the Kamado is completely cooled.
If you know someone who is considering becoming Kamado (not becoming a commando; that’s another issue and we’re not touching that), be sure to link them to this article. Many thanks for joining us today and enjoying your grilling adventures!